How to Create DIY Engagement Party Invitations: A Step-by-Step Guide
Creating your own engagement party invitations is a wonderful way to add a personal touch to your celebration while also saving money. With a bit of creativity and some basic supplies, you can design and craft beautiful invitations that reflect your unique style. Here’s a step-by-step guide to help you create DIY engagement party invitations that will impress your guests.
Step 1: Gather Your Supplies
Before you start, make sure you have all the necessary supplies. Here’s a basic list to get you started:
- Cardstock or high-quality paper: Choose a sturdy paper for the base of your invitations.
- Envelopes: Select envelopes that match or complement your paper.
- Printer: A good quality printer for printing your designs.
- Cutting tools: Scissors, a paper trimmer, or a craft knife.
- Adhesives: Glue sticks, double-sided tape, or a glue gun.
- Decorative elements: Ribbon, lace, washi tape, stamps, or stickers.
- Pens or markers: For hand-lettering or adding personal touches.
- Design software: Programs like Canva, Adobe Spark, or even Microsoft Word.
Step 2: Choose a Design and Theme
Decide on a theme and design that reflects your personality and the style of your engagement party. Consider the following elements:
- Color Scheme: Choose colors that match your party’s theme or your favorite colors as a couple.
- Fonts: Select fonts that are easy to read and match the tone of your event, whether formal or casual.
- Graphics: Incorporate graphics such as florals, geometric shapes, or custom illustrations that fit your theme.
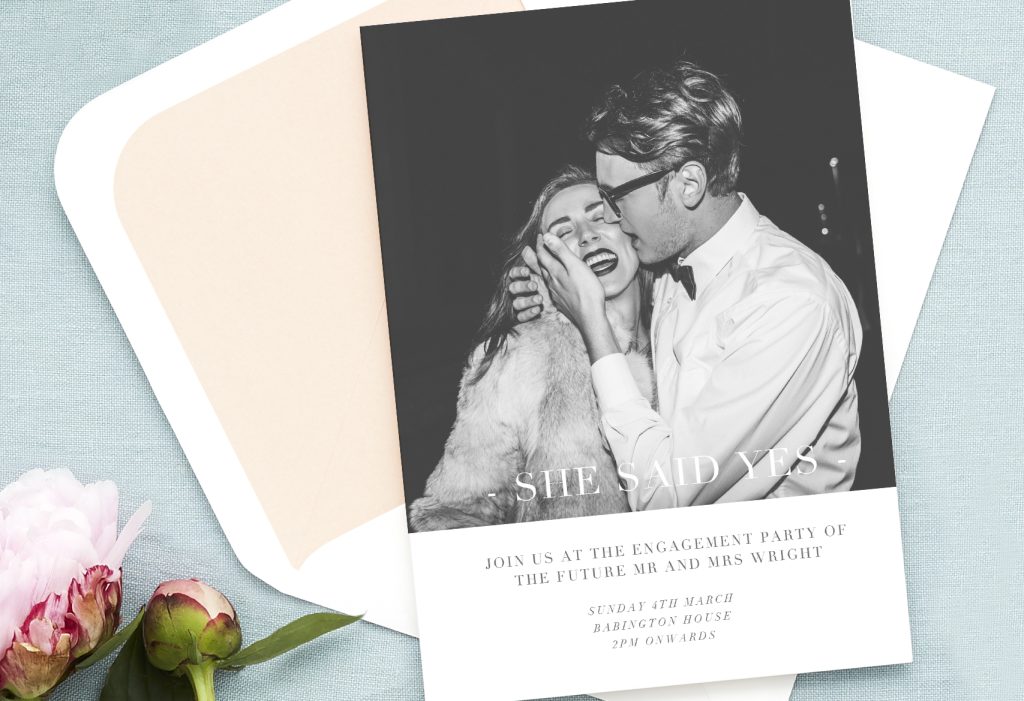
Step 3: Create Your Invitation Template
Using design software, create a template for your invitations. You can find free templates online or design your own from scratch. Here’s a simple layout to follow:
- Header: “You’re Invited!” or “Join Us to Celebrate!”
- Names: Include the names of the couple.
- Details: Date, time, and location of the engagement party.
- RSVP Information: How and when to RSVP.
- Additional Info: Dress code, directions, or other relevant details.
Step 4: Print Your Invitations
Once your design is ready, it’s time to print:
- Test Print: Print a test copy to check for any errors or design issues.
- Print Settings: Set your printer to the highest quality setting and ensure you have enough ink.
- Batch Printing: Print your invitations in batches to manage any issues that may arise during printing.
Step 5: Cut and Assemble
After printing, cut your invitations to size:
- Cutting: Use a paper trimmer for straight, clean edges. If you prefer a more decorative edge, use craft scissors.
- Assembling: If your design includes layers or additional elements, assemble them using your adhesive. For example, you might glue a printed card onto a slightly larger piece of colored cardstock to create a border.
Step 6: Add Personal Touches
Make your invitations stand out by adding personal and decorative touches:
- Hand-Lettering: Add hand-written elements like guest names or a personal note.
- Embellishments: Attach ribbon, lace, or washi tape for added texture and interest.
- Stamps and Stickers: Use stamps or stickers to enhance the design and add flair.
Step 7: Address the Envelopes
Addressing your envelopes can be done in a variety of ways:
- Hand-Addressing: For a personal touch, hand-write the addresses using a calligraphy pen or a nice marker.
- Printed Labels: Print address labels if you prefer a uniform look.
- Decorative Elements: Add a wax seal, a piece of ribbon, or a small sticker to close the envelopes and give them a polished look.
Step 8: Send Out Your Invitations
Now that your invitations are ready, it’s time to send them out:
- Postage: Ensure you have the correct postage for your envelopes, especially if they are oversized or bulky.
- Timing: Send out your invitations at least 4-6 weeks before the engagement party to give your guests plenty of notice.
Additional Tips
- Budget Wisely: DIY invitations can be cost-effective, but be mindful of the cost of materials and any potential mistakes.
- Stay Organized: Keep a checklist and timeline to stay on track with your DIY project.
- Seek Help: Don’t hesitate to ask friends or family for help, especially with cutting and assembling.
Conclusion
Creating DIY engagement party invitations is a rewarding and creative way to kick off your wedding celebrations. By following these steps and adding your personal touch, you can craft beautiful and memorable invitations that will delight your guests. Enjoy the process and let your creativity shine!